
-
 Dave Vinke
- Leestijd: 5 min
- Laatst geüpdatet: 27/08/2025

Special effects transform ordinary model kits into realistic miniatures with character and story. You can apply weathering techniques, rust effects, wear and aging to give your models an authentic appearance. These techniques range from simple dry brushing for beginners to advanced corrosion effects for experienced modelers. With the right materials and techniques, you create convincing details that bring your models to life.
What are the most popular weathering techniques for beginners?
Dry brushing, washing and stippling are the three best weathering techniques for beginners in model making. These methods deliver immediately visible results without expensive materials or years of experience. You only need basic paint, brushes and some patience to create your first realistic effects.
Dry brushing works by lightly loading a brush with paint and gently stroking it over protruding parts. Use a flat brush with stiff bristles and wipe off excess paint on paper towels before you begin. This technique perfectly emphasizes details like bolts, edges and textures.
Washing means applying diluted, dark paint into cavities and seams. Mix acrylic paint with water or special washing medium to a milky consistency. The liquid flows naturally to the deepest points and creates natural shadows and dirt accumulation.
You use stippling for rust and corrosion effects. Dip a stiff brush in orange or brown paint and gently dab it on the surface. Vary the pressure and amount of paint for natural irregularity. This technique works fantastically on metal parts of vehicles.
How do you create realistic rust and aging effects?
Realistic rust develops by building up layers of different colors, starting with dark base colors and ending with light rust tints. Start with dark brown or black in cavities, add orange rust to flat areas, and finish with light orange highlights on edges where rust occurs most.
Begin with a dark base layer of burnt umber or payne’s grey in all seams and cavities. Let this dry completely before continuing. This dark base simulates deep corrosion and dirt buildup that naturally forms in sheltered areas.
Next apply medium rust colors using stippling techniques. Use raw sienna, burnt sienna and cadmium orange in different proportions. Vary the intensity by treating some areas heavily and others sparingly. Think about where water would pool or where metal would be most exposed.
For fresh rust effects, use light orange and yellow ochre on edges and protruding parts. These light tints suggest recently formed rust that hasn’t yet deeply eaten in. Blend the transitions carefully with a clean, damp brush for natural color gradations.
You create aging by mimicking different material properties. Use matte paint for old, weathered surfaces and glossy accents for metal that has been polished through use. Add dust effects with very light stippling of beige or light grey.
What materials do you need for professional model making effects?
Acrylic paint, different brush types, washing medium and matte varnish form the basis for professional model making effects. You don’t need expensive specialist products to begin, but quality brushes and good paint do make a real difference in your end result.
For paint, preferably choose acrylic because it’s water-based, dries quickly and is easy to clean. You need at least these colors: black, white, burnt umber, raw sienna, burnt sienna, cadmium orange, and payne’s grey. This basic palette lets you create almost all weathering effects by mixing colors.
Brushes are important for different techniques. A set of flat brushes in sizes 2, 6 and 10 for dry brushing, round brushes size 0 and 2 for detail work, and an old toothbrush for texture effects. Buy good quality brushes with natural bristles for the best paint control.
Washing medium helps paint flow better and slows drying time. You can also just use water, but special medium gives more control. For matte effects you need matte varnish to convert glossy paint to realistic, weathered surfaces.
Budget-friendly alternatives are paper towels instead of expensive cloths, old toothpicks for detail work, and household sponge for texture effects. Start small and build your material collection slowly as you learn more techniques.
How do you apply wear and usage marks to vehicle models?
Wear on vehicle models develops by thinking logically about where parts would naturally wear through use, weather influences and contact. Focus on handles, steps, wheel wells and areas around exhausts where realistic wear would occur.
For metal wear, use dry brushing with silver or gunmetal on edges and protruding parts. Think about handles, pedals, and parts of the bumper where shoes would come against. Use a lightly loaded brush and build up intensity slowly with multiple thin layers.
You create tire wear marks by applying dark washes around the wheel wells and on the bottom of the vehicle. Mix black paint with washing medium and let this flow naturally downward. Add mud effects with stippling of burnt umber mixed with some texture paste.
You simulate paint wearing off by first applying the underlying color, then the top layer, and then carefully sanding away the top layer in logical places. Use fine sandpaper or a scalpel blade for controlled wear on edges and corners.
For exhaust soot, use black wash around exhaust pipes and let this run naturally downward. Add some dry brushing with dark grey for layered soiling. Vary the intensity depending on the type of vehicle and age you want to suggest.
Where do you find the best materials for model making effects?
Quality model making materials can be found at specialized hobby shops that understand what model makers need. We have assembled at Speedcube an extensive model making assortment with everything you need for professional effects, from basic materials to advanced products.
Choose brands known for their quality and user-friendliness. Vallejo, Tamiya and Mr. Color make excellent acrylic paint that mixes well and dries evenly. For brushes, Winsor & Newton and Da Vinci are reliable choices that last long with proper maintenance.
You manage budget smartly by first acquiring the basics and gradually expanding your collection. Start with a starter set of paint, a few good brushes and basic accessories. As you learn more techniques, you can add specialist products like texture pastes, special washing media and weathering sets.
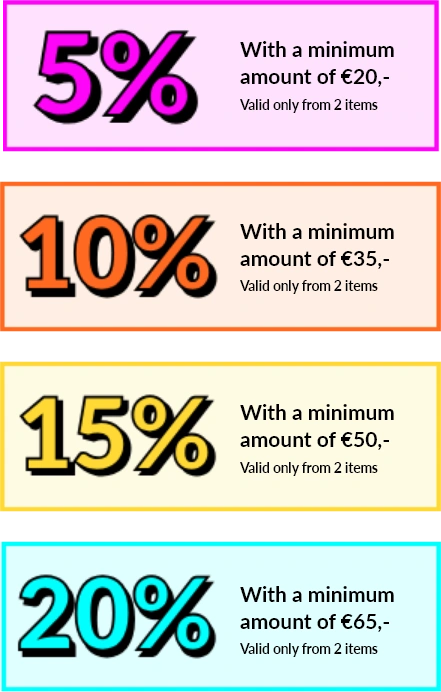
With us you benefit from automatic discounts when you order multiple items, which is perfect for assembling a complete material kit. We understand that model making is an investment and are happy to help you choose the right products that fit your level and budget.
Always compare prices and read reviews from other model makers before investing in more expensive products. Some techniques you can perfectly execute with basic materials, while others really benefit from specialist products. Start simple and upgrade where necessary.
Frequently Asked Questions
How long should I wait between different weathering layers?
Let each layer dry completely for at least 30-60 minutes before applying the next one. With acrylic paint you can speed this up with a hair dryer on low setting, but never force the drying time. Patience between layers prevents colors from mixing and ensures sharper, more controlled effects.
What do I do if my weathering effect has become too exaggerated?
Don't panic! As long as the paint isn't completely dry yet, you can dab away excess weathering with a clean, damp cloth or cotton swab. With dry paint you can carefully sand with fine sandpaper (1000+ grit) or apply a new base layer and start over.
Can I also apply weathering techniques to plastic models?
Absolutely! Plastic models are even ideal for weathering because acrylic paint adheres excellently to plastic surfaces. Just make sure your model is completely clean and grease-free before you begin. A thin primer layer can further improve adhesion, especially on smooth plastic parts.
How do I make my weathering effects permanent and protect them?
After completion, apply a thin layer of matte varnish over your entire model. This protects the weathering effects against damage and gives a uniform, realistic matte finish. Use a soft brush or airbrush for even coverage and avoid thick layers that can mask details.
What common mistakes should I avoid on my first weathering project?
The biggest mistake is wanting to do too much at once. Start with one technique per session and build up slowly. Also avoid using paint that's too wet with dry brushing - less is always more. Test new techniques first on a hidden part or spare component before applying them to your main model.
How do I choose the right colors for different weather conditions?
For dry, dusty environments use beige and light brown tints. Wet, muddy conditions call for dark brown and grey colors. Maritime weathering gets greenish tints from algae and salt corrosion. Study reference photos of real vehicles in comparable conditions for the most authentic color choices.
Is it possible to combine weathering effects with LED lighting in my model?
Yes, but plan this in advance! First install your LED system and test it completely before applying weathering. Weathering can even help camouflage LED wires. Just note that matte varnish can dim the light, so account for slightly stronger LEDs or leave illuminated areas untreated.
Table of contents
Much viewed


More blogs