
-
 Dave Vinke
- Leestijd: 5 min
- Laatst geüpdatet: 15/10/2025

Proper preparation is crucial for successfully completing difficult wooden building kits. This starts with understanding the complexity, gathering the right tools, thoroughly studying instructions, and setting up an optimal workspace. This guide answers the most frequently asked questions about preparing for challenging wooden model building projects.
What actually makes a wooden building kit difficult?
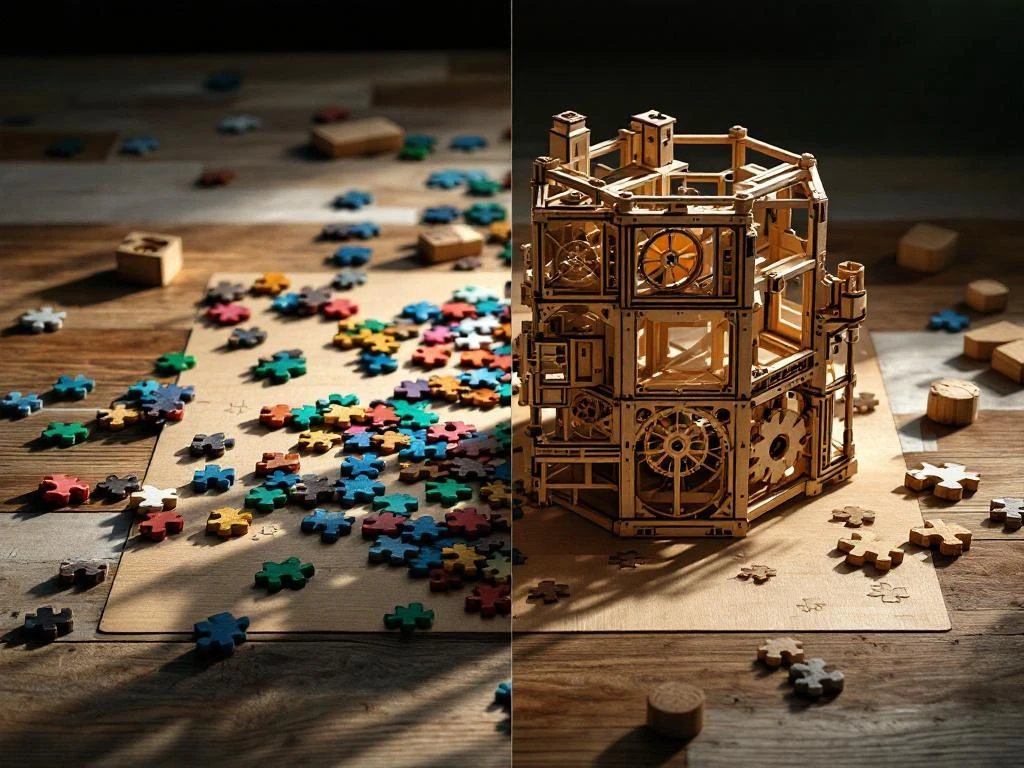
The difficulty level of a wooden building kit is determined by the number of parts, precision of fit, level of detail, and required skills. Complex models often contain hundreds of small parts that must be assembled with millimeter precision.
The number of parts plays a significant role in complexity. Simple building kits have 20-50 parts, while advanced models can contain more than 300 parts. Each additional part increases the chance of errors and raises the required time and concentration.
The precision of fit determines how easily parts fit together. With cheap building kits, parts may be too tight or too loose, requiring extra sanding or glue. High-quality models have parts that fit together perfectly without many adjustments.
The level of detail also significantly affects difficulty. Models with realistic details like small windows, doors, or moving parts require more patience and precision. Beginners should start with simple shapes and gradually move on to more detailed projects.
What tools do you really need for difficult wooden building kits?
For complex wooden model building, you need both basic tools and specialized instruments. Essential tools include sandpaper (various grits), wood glue, a sharp hobby knife, small files, and tweezers for handling small parts.
Basic tools you’ll always need include various types of sandpaper (from coarse 120-grit to fine 400-grit), quality wood glue that dries quickly, and a hobby knife with replaceable blades. A cutting mat protects your work surface and ensures straight cuts.
Specialized instruments make the work considerably easier. A small drill with various drill bits helps when making holes for pins or screws. Small clamps hold parts in place while drying. A magnifying glass or loupe is essential for working on small details.
Invest in quality tools within your budget. Cheap tools can ruin your project by failing to function properly at crucial moments. Start with solid basic tools and gradually expand your collection as you gain more experience.
How do you read building kit instructions effectively before you start?
Reading instructions effectively begins with completely reviewing the manual before you start building. Identify critical steps, look for potential problem points, and create a work plan. This prevents costly mistakes and frustration during the building process.
Start by studying the parts list and check if all parts are present. Arrange parts in an organized manner according to the numbering in the instructions. This saves time during building and prevents you from losing parts.
Pay extra attention to steps that require glue, as these are usually irreversible. Mark these steps in the instructions and make sure you use the right amount of glue. Too much glue can cause visible stains, while too little glue creates weak connections.
Make notes for unclear instructions or draw additional guide lines on the diagrams. Search online for videos or forums from other builders who have made the same model. Their experiences can provide valuable tips for difficult passages.
Why is the right workspace so important for complex building kits?
A well-organized workspace increases precision, prevents errors, and makes the building process much more enjoyable. Good lighting, sufficient space, clean work surface, and organized storage of parts are essential for successful model building.
Lighting is crucial for accurate work. Use a combination of general lighting and a focused desk lamp. LED lights provide bright, white light without heat development. Avoid yellow lights that distort colors and make details difficult to see.
Ventilation is important when using glue and finishing products. Ensure adequate air circulation to remove fumes. A small fan can help, but avoid strong air currents that might blow small parts away.
Organization of your workspace saves time and prevents frustration. Use small containers or compartments for different parts. Keep tools within reach but organized. A tidy workspace helps you stay focused on the project.
Where can you find the best wooden building kits for your level?
Quality wooden building kits can be found at specialized model building stores that offer various difficulty levels, brands, and price ranges. Look for stores with comprehensive product information, honest reviews, and good customer service for advice on your choice.
Review different difficulty levels before making a choice. Beginners should start with models labeled as “easy” or “beginner.” These usually have fewer than 100 parts and clear instructions. Advanced builders can choose from more complex models with more details and challenges.
Read product descriptions carefully and pay attention to details like the number of parts, dimensions of the final result, and whether glue and paint are included. Some building kits contain everything you need, while others only contain the wooden parts and instructions.
With us, you’ll find an extensive range of model building products for all levels. We offer a special selection of wooden building kits from various brands and difficulty levels. Our product pages contain detailed information about each model, so you can make an informed choice that matches your skills and interests.
Good preparation is the key to success with difficult wooden building kits. By understanding the complexity, gathering the right tools, thoroughly studying instructions, and setting up an optimal workspace, you significantly increase your chances of a successful and enjoyable building process.
Frequently Asked Questions
How long does it take on average to complete a difficult wooden building kit?
Building time varies greatly depending on complexity and your experience, but expect 15-40 hours for advanced models. Plan short building sessions of 1-2 hours to stay focused and prevent mistakes. Never rush - it's better to work slowly and accurately than to have to fix errors.
What do you do when parts don't fit properly during building?
First check if you're using the correct parts according to the instructions. Use fine sandpaper (220-400 grit) to carefully sand parts until they fit properly. Never force parts together - this can lead to breakage. For serious fitting problems, you can contact the manufacturer for replacement parts.
How do you prevent small parts from breaking during building?
Always handle small parts with tweezers and work above a light surface so fallen pieces are easy to find. Store fragile parts in separate containers until you need them. Use minimal pressure when assembling and let glue connections dry completely before continuing to the next step.
What mistakes do beginners make most often with difficult building kits?
The most common mistakes are: using too much glue causing excess glue to be visible, skipping steps or performing them in the wrong order, and forcing parts that don't fit properly. Additionally, many people start too ambitiously with a model that's too difficult. Always start with your skill level and work gradually upward.
How do you deal with frustration when a building project isn't working?
Stop and take a break when you get frustrated - continuing to work often leads to more mistakes. Analyze what went wrong and search online for solutions or tips from other builders. Many problems can be solved with patience and the right approach. Remember that every mistake is a learning moment for your next project.
Can you repair parts if they accidentally break?
Yes, broken wooden parts can often be repaired with wood glue and patience. Apply glue to both parts, press them firmly together, and let dry for at least 24 hours. For extra strength, you can reinforce the break with a thin piece of wood on the back. With small splinters, you can often glue them back using a toothpick to apply the glue precisely.
When is it time to move up to a more difficult building kit?
Move up to a more difficult level when you can complete your current models without major problems and you're starting to get bored. Signs are: you need less time than indicated, you hardly make mistakes anymore, and you feel comfortable with all techniques used. Then choose a model that's one step more difficult, not immediately the most complex available kit.
Table of contents
Much viewed


More blogs